

How to Make Your Own Perfect Fruit Plate…. Or Not
If you speak to a great number of yacht chefs (at least the ones I know) you’ll find that building beautiful fruit presentations can bring great joy. It’s one of those jobs that I find to be a nice start the day and can provide a meditation or catharsis of sorts. Like the calm before a storm, when one day of cooking can vary so widely to the next. Perhaps you’ve been on a charter, or a trip where you experienced these plates of fruity art. So, what goes into making these often-beautiful thought out creations? Turns out it’s probably not as difficult to recreate as you think, soon you could be pretending to be on holiday in your own home. Wow your family with your elaborate looking displays at breakfast that just might inspire them to up their fruit intake.
My own method usually consists of picking a sort of theme if you will. Are you willing to get as elaborate as carving? Or are vibrant colour schemes more your pace? Here’s a list of ideas for your fruit plate building venture:
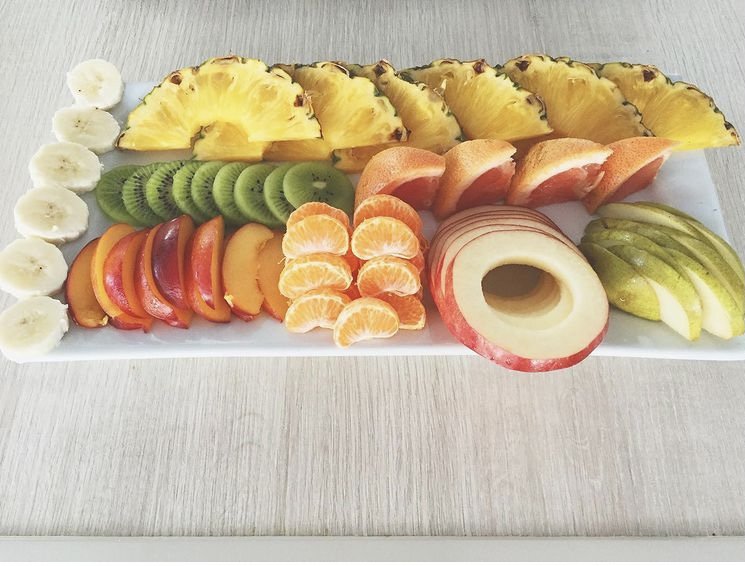
>Contrasting Colours: Pick one colour of fruit, let’s say green (green grapes, honeydew melon, kiwi, green apple) and intersperse it with pops of a different contrasting colour in this instance perhaps blueberries. Or similarly alternate two colours of fruit in vertical lines like a line of honeydew chunks, a line of raspberries, a line of green grapes, a line of halved strawberries, a line of kiwi slices, and a line of watermelon chunks.
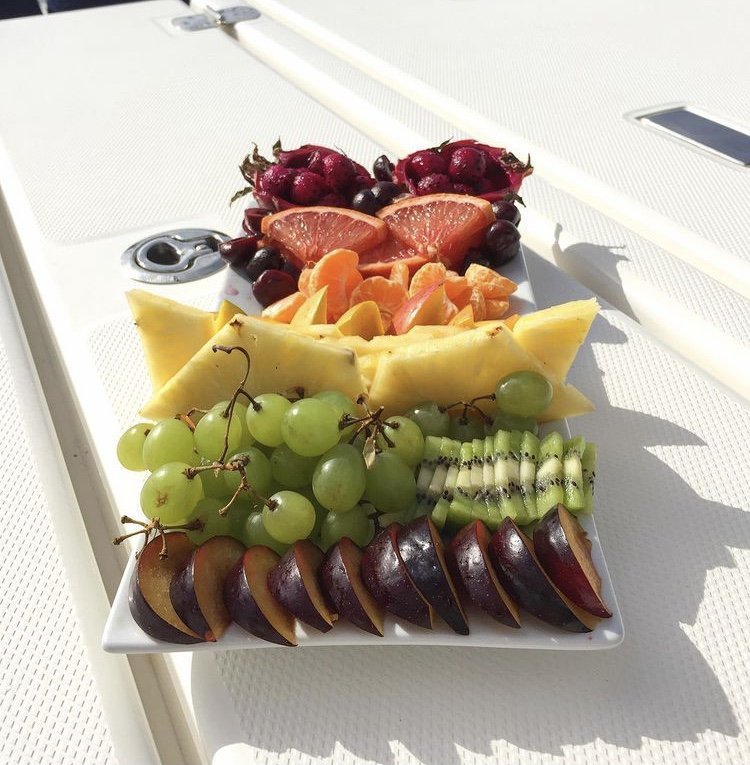
>All the Colour!: One of my favourite fruit plates that I have ever made used not just a couple of colours of fruit, but instead ALL the colours of fruit. This gives you a great selection of different types of fruit, and I laid them out in a rainbow sequence. This would also be extremely satisfying for anyone with a touch of perfectionism as you can organise the fruits by colour, and the end product will be stunning.
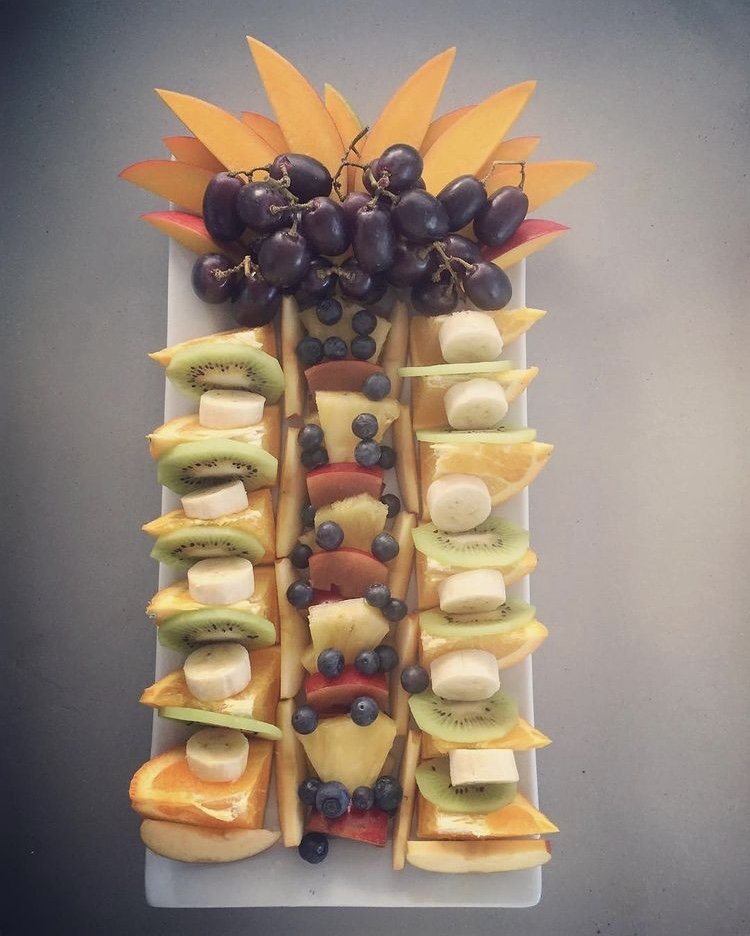
>Using Fruit to Create a Picture: You could use this method to create simple “images” or get a bit abstract with it. In the past I have used fruit to create palm trees, cuttlefish, and faces. You could create wavy lines of sliced fruits for an interesting abstract effect. You could lay fruit out to create simple shapes like stars and concentric circles. The options here are only limited by the amount of effort you want to put into it. You could even use my next tip to help decorate your “pictures”.
>Don’t Limit Yourself to the Shape of the Fruit: You know those cute small cookie/biscuit/fondant cutters in the shape of stars, hearts, dogs, dinosaurs, and leaves (and whatever else…) that you impulse bought that one time because you just couldn’t resist the idea of maybe using them to make cool cookie/biscuit/fondant shapes one day? (Surely I can’t be the only one… 😅) Well I’m here to tell you that today is the day you can dig them out from the bottom of the drawer and use them for an alternate purpose. Using them to cut shapes out of fruit is also a lot less effort than making cookies, and now you can be smug that the statement of ‘Yes, I will use these’ has come true. Melon ballers are also a nice way to create a different shape. Apple rings give a nice shape to a fruit plate as well, simply slice the apple and use a small round cookie/biscuit cutter to cut out the seeds before arranging as desired.
>Carving the Fruit: Now hear me out, I know this sounds like a right pain, but there are a few simpler carvings you can make. Sharks out of watermelon are relatively simple. If you have a large watermelon cut it in half-ish width ways, if you have a medium or smaller watermelon just cut one end off so that there is a base for the melon to stand on. On one side of the watermelon where you’d like the mouth to be make two diagonal cuts one above the other, joining them so that you can remove the chunk of melon. Scoop out the melon from its rind (and put to the side to be cut up as desired for use when assembling, a melon baller is useful for this) to create a bowl-like cavity for other fruit to be placed in. Along the edges of the mouth use a peeler to remove the green flesh of the rind to expose the white of the rind. Imagining a zig zag cut triangles out of the white rind to create the teeth. Add desired fruit to the shark’s mouth. You can use grapes or blueberries and toothpicks to make eyes and can use a part of the rind you removed to create the mouth as a fin securing it with toothpicks. Okay… maybe that was a bit elaborate, so if you want a simpler carving type job you can create a zig zag effect on kiwis by inserting the tip of a small knife half-way through the kiwifruit in a zig zag pattern ˄˄˄˄ around the circumference of the fruit and it will come apart once you join the last and first cuts. You can also use this method on any sort of rounded fruit. Another simple carving idea is to use halved fruits with the fruit scooped out as bowls, pineapples and melons are attractive options for this.
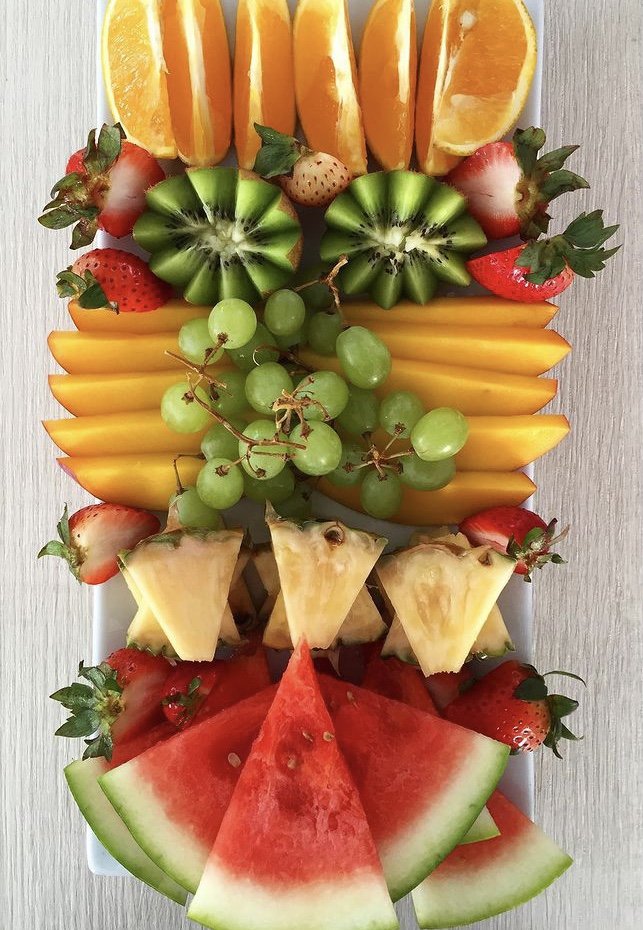
>The Nonchalant Fruit Plate: Alright, so that’s all a bit of a faff, but don’t worry even if you don’t want to put all that effort into creating a fruit presentation, a beautiful fruit plate is still achievable. Just cut your desired fruits into simple slices or pieces and take a few small bunches of grapes and just sort of haphazardly or nonchalantly place them all around a plate. Feel free to layer them a bit. Put some melon slices along that edge, a couple of slices of pineapple here and there. Nestle some bunches of grapes in there next to some wedges of orange and grapefruit. Halve or slice a couple of bananas. Sometimes fruit is pretty photogenic all on its own.
And if you really can’t be bothered with all that there’s always this one ---
>The Fruit Plate Not Made by You: That’s right. If fruit plate art is not in your breakfast’s near future but you definitely still want one, you could always book someone like me to come make one for you (Other breakfast items also included). 😉